Follow Me On Social Media!

Easy Mini Tart Shells: The Best Homemade Delight Every Time
Introduction to Easy Mini Tart Shells
There’s something irresistibly charming about easy mini tart shells that evokes a sense of accomplishment right from the first bite. Picture a delightful gathering where friends admire your baking skills, captivated by these beautifully crafted, bite-sized treats. Whether you fill them with luscious creams, vibrant fruits, or rich chocolates, mini tarts showcase creativity in both flavor and presentation, turning any event into a celebration.
What makes these delightful shells even more appealing is their versatility. As a passionate home cook, I often find myself reaching for this recipe when I want to impress guests without spending hours in the kitchen. The truth is, these easy mini tart shells offer a perfect canvas for your culinary imagination. They can be sweet or savory, making them suitable for brunch, dessert, or even cheese boards at a cocktail party.
Moreover, crafting your own tart shells allows you to control the ingredients, ensuring a fresher, healthier option compared to store-bought alternatives. Think about it—using high-quality butter and flour means each tart comes with its own unique taste and texture. Plus, you can customize them to accommodate different dietary needs or preferences. What’s not to love about that?
Why Easy Mini Tart Shells Are Perfect for Homemade Treats
-
Versatility: Easy mini tart shells can be filled with an endless variety of ingredients. Sweet options might include fresh berries, custards, or chocolate ganache, while savory fillings could feature ingredients like quiches, cheeses, or vegetables.
-
Portion Control: These tiny treats are just the right size for a quick indulgence—ideal for entertaining or satisfying a sweet tooth without the guilt of overindulging.
-
Presentation: There’s something inherently elegant about a beautifully arranged platter of mini tarts. They instantly elevate any gathering, impressing your friends and family with minimal effort.
-
Make-Ahead Option: You can prepare the tart shells in advance, freeing up time to focus on other aspects of your meal or event.
Embracing the art of making easy mini tart shells is not just about baking; it’s about creating memorable experiences and delicious moments that you can share with your loved ones.
Key Ingredients for Easy Mini Tart Shells
Creating easy mini tart shells isn’t just about following steps; it’s about using the right ingredients to achieve that flawless, buttery crust that cradles all your delicious fillings. Let’s delve into those essential components that can transform your baking experience.
-
Flour: All-purpose flour serves as the backbone of your tart shell. For a sturdier crust, consider using a mix of all-purpose and whole wheat flour. This gives the shells a delightful nutty flavor.
-
Butter: Unsalted butter is key here. It brings richness and flavor, and I recommend using cold butter cut into small pieces. This prevents the crust from becoming tough and helps achieve that flaky texture we crave.
-
Powdered Sugar: Unlike granulated sugar, powdered sugar dissolves quickly and gives your tart shells a subtle sweetness with a smoother texture. It’s a small detail that makes a big difference!
-
Salt: A pinch of salt balances the sweetness and enhances the flavors. It may seem minor, but it’s crucial for bringing out the best in your tart shells.
-
Egg Yolk: Using an egg yolk adds richness and helps bind the dough together, resulting in a sturdier yet tender crust.
By carefully selecting and measuring these ingredients, you can easily whip up a batch of easy mini tart shells that will impress your friends and family with every bite. Happy baking!
Why You’ll Love These Easy Mini Tart Shells
Have you ever wanted to impress your friends with a delightful dessert that seems way more complex than it actually is? That’s where easy mini tart shells come into play. Picture this: a buttery, flaky crust cradling your choice of sweet or savory filling, all effortlessly crafted without breaking a sweat. These mini marvels offer elegance and taste in every bite, making them the perfect dish for any occasion.
Perfect For Any Filling
One of the best things about these easy mini tart shells is their versatility. Sweet, savory, or a little bit of both—the options are endless! Imagine filling them with fresh fruits, rich chocolate mousse, or even a creamy quiche mixture. You can customize each tartlet to suit your preferences or match seasonal ingredients.
A Fun Cooking Experience
Making these tart shells is not just about the final product; it’s an enjoyable cooking adventure. As you work the dough and watch it transform in the oven, you’ll feel like a pro in the kitchen. Plus, they’re perfect for gatherings—watch as guests eagerly reach for their own mini creations.
These easy mini tart shells are straight-up delightful and sure to become a go-to recipe for your culinary repertoire!
Variations of Mini Tart Shells
Creating easy mini tart shells opens up a world of delicious possibilities in the kitchen. The versatility of these delightful little shells allows them to shine in various savory and sweet forms, transforming each occasion into a culinary adventure. Let’s explore some exciting variations that you can whip up, ensuring your gatherings are both impressive and delectable.
Sweet Creations
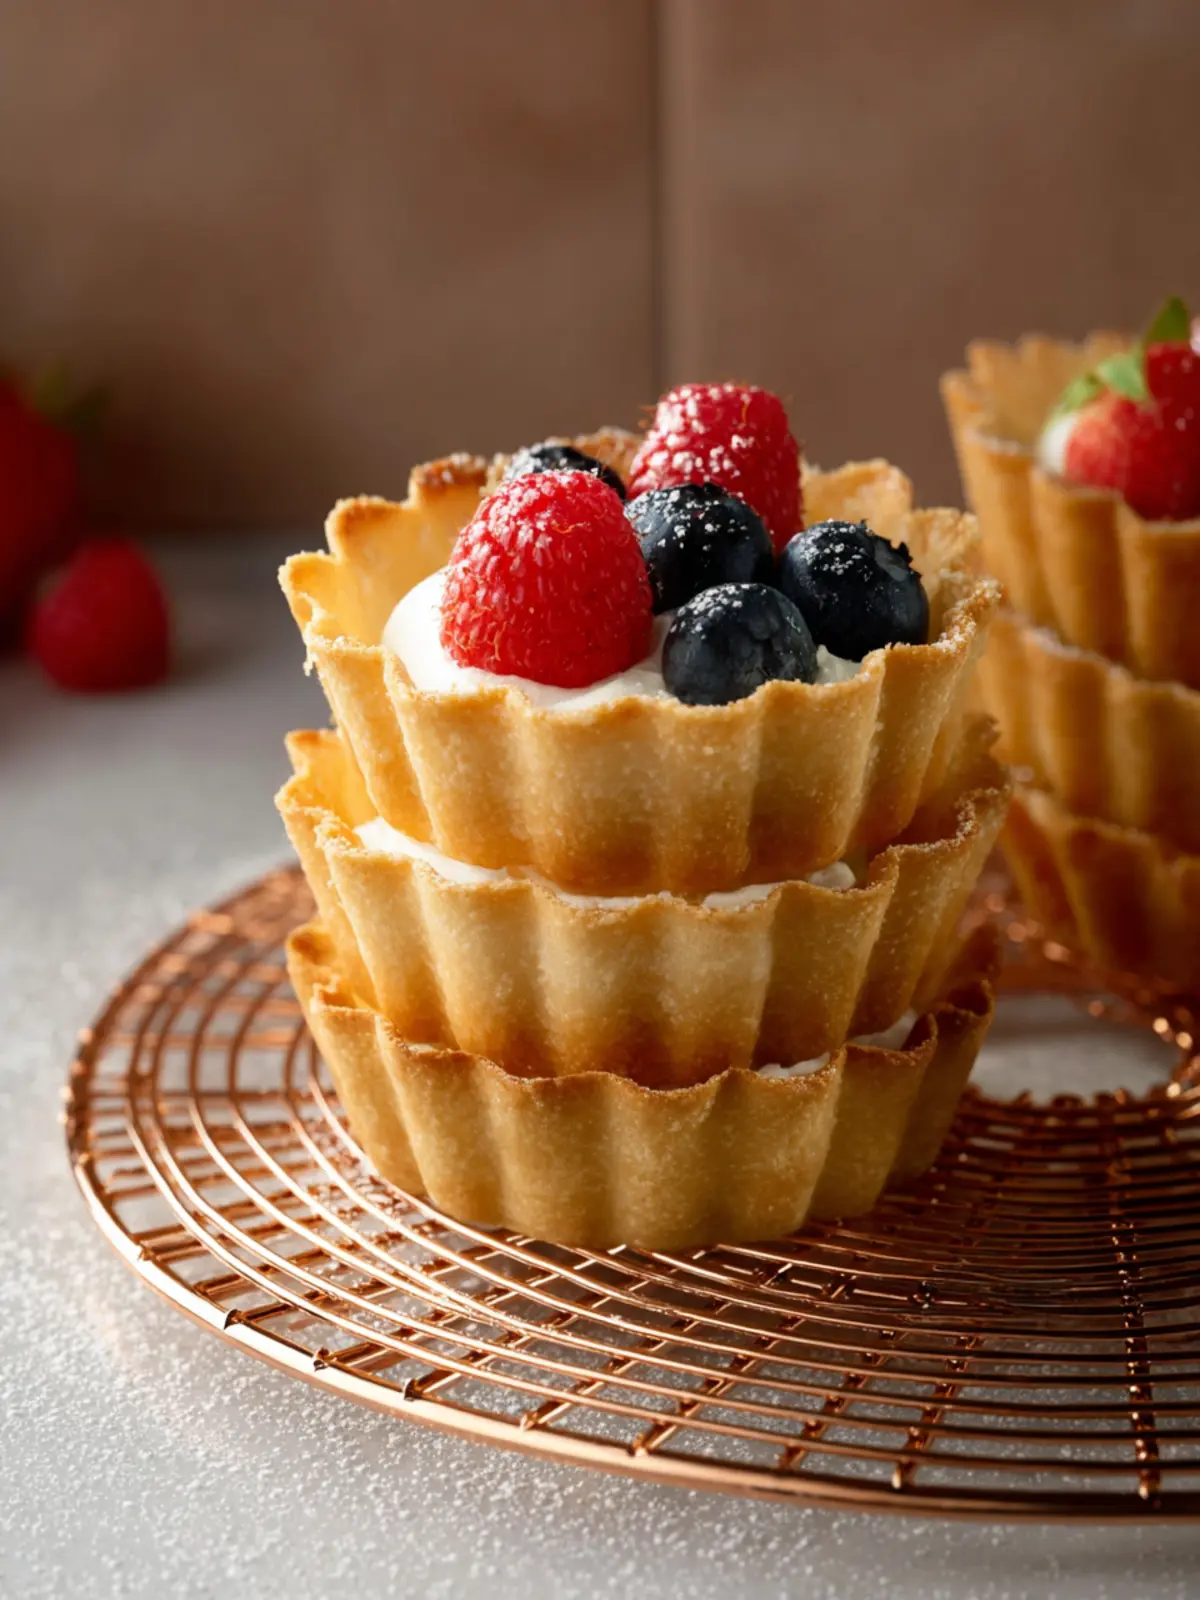
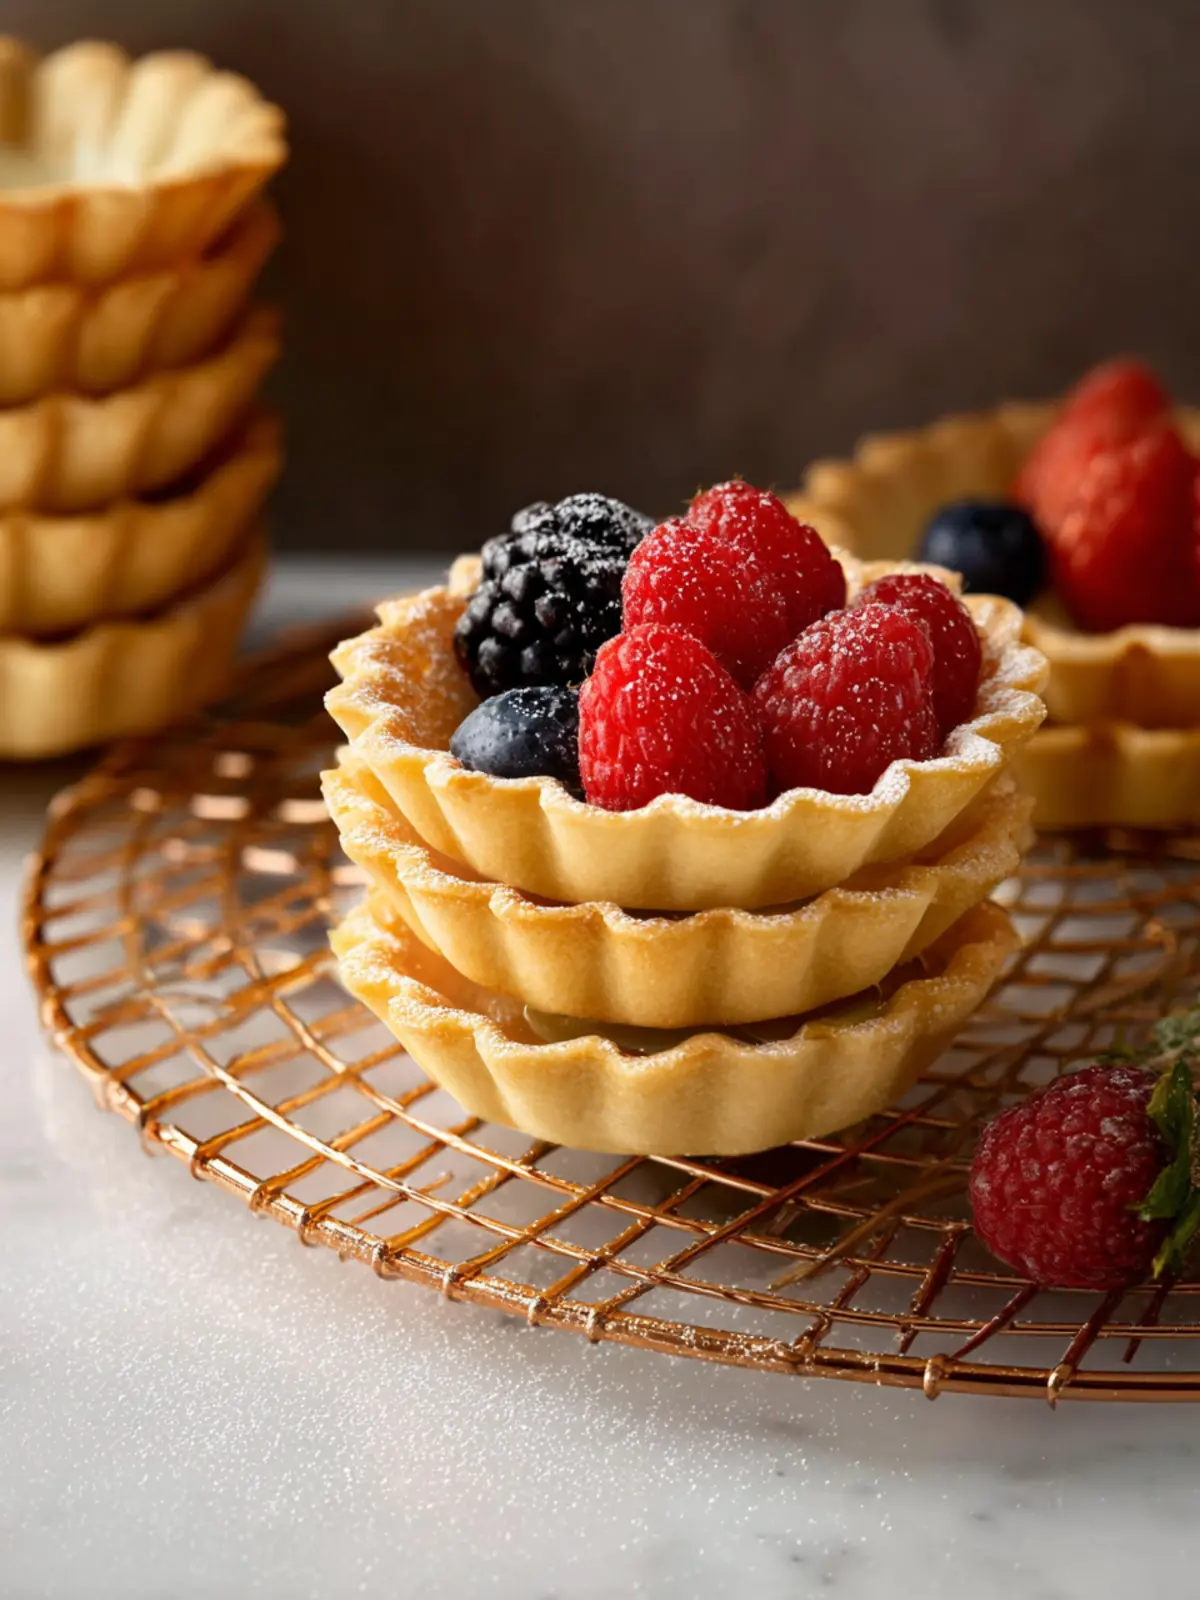
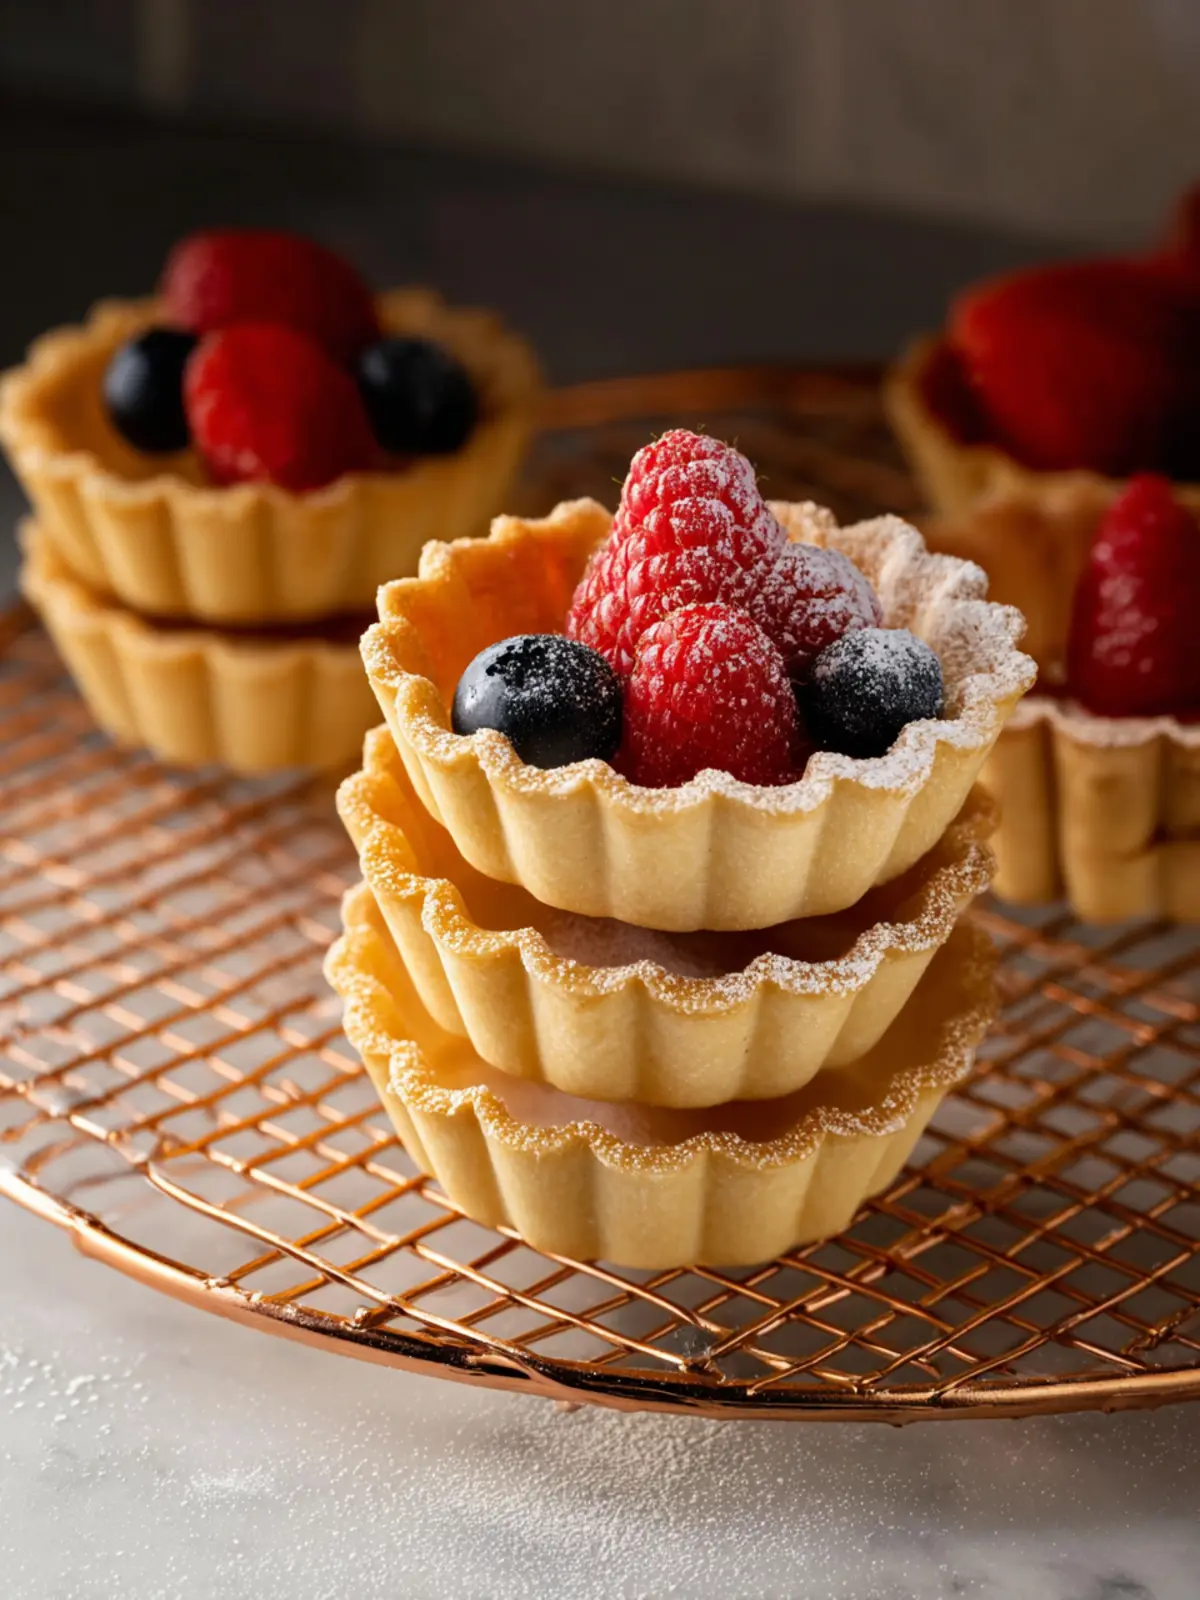
- Fruit Tart: Top your easy mini tart shells with a rich pastry cream and an assortment of fresh seasonal fruits. Think strawberries, blueberries, and kiwi for a refreshing summer treat.
- Chocolate Ganache Tart: Pour a luscious chocolate ganache into your shells, allowing it to set before garnishing with whipped cream and chocolate shavings for a rich dessert.
Savory Options
- Quiche Tartlets: Fill your tart shells with a mixture of beaten eggs, cream, cheese, and your choice of veggies or meats. Bake until set for a delightful brunch option.
- Mediterranean Mini Tarts: Stuff the shells with hummus, olives, chopped tomatoes, and feta cheese for a flavor-packed appetizer that transports you to the Mediterranean.
Seasonal Themes
- Pumpkin Spice Tarts: Embrace autumn with a spiced pumpkin filling, topped with whipped cream or a sprinkle of cinnamon.
- Holiday Eggnog Tarts: For festive gatherings, create a rich eggnog custard filling that’s sure to impress your guests throughout the winter season.
With these variations, your easy mini tart shells will certainly become a staple in your culinary repertoire, allowing for endless creativity and delicious results!
Tips for Perfectly Baking Mini Tart Shells
Baking easy mini tart shells is not just a delightful experience; it’s also a rewarding journey that can fill your kitchen with wonderful aromas. To ensure your mini tart shells turn out perfectly every time, here are some practical tips based on my own baking adventures.
Choose Quality Ingredients
- Butter: Use high-quality unsalted butter for a rich flavor. Cold butter helps create flaky layers, so avoid letting it soften too much before incorporating it into your dough.
- Flour: Opt for all-purpose flour to strike the right balance in texture. If you’re feeling adventurous, try a whole wheat flour for added nuttiness.
Managing the Dough
- Chill the Dough: Remember to chill your dough after mixing. This is crucial for maintaining that lovely, flaky texture and preventing shrinking during baking.
- Roll Evenly: Roll the dough to about 1/8 inch thick. Keeping consistent thickness throughout ensures even baking, helping your tart shells achieve that perfect golden color.
Bake Smart
- Pre-Bake Wisely: Pre-baking (or blind baking) your mini tart shells can help prevent sogginess. Use pie weights or dried beans to hold the dough down during baking.
- Watch the Time: Keep an eye on your shells as they bake. They can go from golden to overdone quickly, so set a timer and check often.
With these tips, your mini tart shells will be ready for any delicious filling you choose, making every bite a moment to remember!
Serving Suggestions for Mini Tart Shells
Making easy mini tart shells is just the beginning! These delightful creations provide a blank canvas for your culinary artistry. Whether you’re hosting a party or simply indulging in a sweet treat at home, the possibilities are endless.
Fresh Fruit Toppings
One of my favorite ways to serve these tart shells is by filling them with a medley of fresh fruits. Think strawberries, blueberries, and kiwi for a vibrant, summery vibe. The natural sweetness of the fruit complements the buttery shell beautifully.
Rich Cream Fillings
For a more indulgent option, consider filling your shells with a luscious pastry cream or whipped mascarpone. A sprinkle of powdered sugar on top adds just the right amount of sweetness.
Savory Options
Don’t shy away from savory fillings! A rich goat cheese and herb mixture can turn these easy mini tart shells into a sophisticated appetizer that will delight your guests.
Personal Touches
Experimenting with flavors is part of the fun! Consider drizzling chocolate ganache or honey for an extra layer of flavor. Your guests will be impressed, and you’ll enjoy every bite!
Time Breakdown for Easy Mini Tart Shells
Creating easy mini tart shells is an enjoyable cooking adventure that comes together rather quickly. Understanding the time breakdown will help ensure a smooth baking experience.
Preparation Time
You’ll need about 15 minutes to gather your ingredients and whip up the dough. It’s the perfect time to sip on a cup of coffee while enjoying the anticipation of delicious tartlets ahead.
Chilling Time
Once your dough is mixed, it will need to chill for 30 minutes. This step is crucial for ensuring that the shells hold their shape during baking.
Baking Time
The baking process takes around 20 minutes. Keep an eye on them as they turn a beautiful golden brown!
Total Time
In just over an hour, including preparation, chilling, and baking, you’ll have delightful easy mini tart shells ready to fill with your favorite fillings.
Nutritional Facts for Mini Tart Shells
When crafting these easy mini tart shells, it’s essential to consider their nutritional profile as they nestle delectable fillings perfectly, making them a crowd-pleaser. Here’s a closer look at what to expect in a standard serving.
Calories
The mini tart shells provide approximately 80 calories each. This makes them a great option for a light dessert or snack without overindulging.
Carbohydrates
Each shell contains around 11 grams of carbohydrates. Most of this comes from the flour, which provides a satisfying, crispy base that holds up to a variety of fillings—sweet or savory.
Fat
With about 4.5 grams of fat per shell, they strike a balance between richness and texture. The butter is key to that delightful flavor while lending a flaky texture that elevates any tart experience.
Incorporating these easy mini tart shells into your cooking repertoire not only adds variety to your meals but also helps you maintain a mindful approach to snacking. Enjoy them in moderation, and let your creativity shine through!
FAQs about Easy Mini Tart Shells
Creating easy mini tart shells can open up a world of delicious possibilities, but sometimes questions arise along the way. Let’s dive into some frequently asked questions to help you navigate your tart-making journey.
Can I make the dough in advance?
Absolutely! You can prepare the tart dough ahead of time. Just wrap it tightly in plastic wrap and refrigerate it for up to two days. If you’re planning on using it later, you can freeze it for up to a month. When you’re ready to use, just let it thaw in the refrigerator overnight.
How do I prevent my tart shells from shrinking?
One common concern when making easy mini tart shells is shrinkage. To minimize this, ensure you let the dough rest in the refrigerator before rolling it out. Additionally, avoid stretching the dough when fitting it into the tart pans. Use pie weights or dry beans when blind baking to keep them in shape.
Can I freeze the tart shells for later use?
Yes, indeed! You can freeze your baked tart shells. Allow them to cool completely, then wrap each shell in plastic wrap and store them in an airtight container. They can be frozen for up to three months. When you’re ready to fill them, there’s no need to thaw—just fill and bake!
What fillings work best with these tart shells?
The beauty of easy mini tart shells is their versatility. Sweet fillings like pastry cream, fruit compotes, and chocolate ganache are fantastic options. For savory versions, think about creamy cheeses, roasted vegetables, or a classic quiche filling. The only limit is your creativity!
Conclusion on Easy Mini Tart Shells
In summary, creating easy mini tart shells is a rewarding culinary experience that elevates your dessert game effortlessly. These versatile shells serve as a canvas for your creativity—whether you fill them with velvety custards, luscious fruits, or even savory mixtures. They’re perfect for gatherings, making your hosting duties a breeze. Remember, the right balance of buttery richness and flakiness is key to your shells’ success. So, embrace the joyful process of baking and let your imagination run wild. With these shells, every occasion becomes an opportunity to delight your guests with delicious, handcrafted treats.
Print
Classic Tart Dough
- Total Time: 2 hours 38 minutes
- Yield: 2 tart shells 1x
Description
This classic tart dough is perfect for a variety of fillings and is easy to make!
Ingredients
Scale
- 8 tbsp unsalted butter (see notes for using salted)
- ½ cup granulated sugar
- ⅛ tsp salt
- 1 egg
- 250 g all-purpose flour (2 cups flour, spooned and leveled)
Instructions
- Using standing mixer with paddle attachment, or using a hand held mixer with a large bowl, cream butter, sugar, and salt at medium speed until combined.
- Mix in the egg, scraping down the bowl to ensure it is fully incorporated.
- Add the flour and mix on low until just incorporated, scraping down the bowl as necessary. Do not overmix.
- On lightly floured surface, divide dough into 2 balls and shape each into a disc ½ inch thick.
- Wrap tightly in plastic wrap and refrigerate for at least 2 hours or overnight.
- When ready to bake, preheat oven to 325 ℉.
- Remove the dough from the fridge and roll out to about ⅛ inch thick.
- Working quickly so the dough stays cold, cut out circles about ½-1 inch larger than the tart pans and gently place into the tart pans, being careful to not stretch out the dough as you want it to stay in place and not shrink back to its original size when baking. Re-roll remaining dough and repeat.
- If mini tarts need more dough, add more dough and press into place. If dough gets too soft, put it back in the fridge or freezer for 10-15 minutes.
- Once you’ve filled the tart shells, cut off any excess using a knife. You can also roll the rolling pin across the top to remove any excess.
- Score the bottoms of the tarts by gently poking the bottom of the tart shells with a fork about 2-5 times, depending on the size of your shells.
- Before baking, chill or freeze the tart shells for 15 minutes.
- Then, place the chilled tarts on a baking sheet and bake in the pre-heated oven for 14-18 minutes (for 4 inch tarts), turning the pan halfway in between. Baking times will vary depending on the size of tart shells. See post for more info.
- When tarts are golden brown, remove from oven and let cool.
- Once cooled, remove from mold, add desired filling, and enjoy!
Notes
- If using salted butter, reduce or omit the additional salt.
- Prep Time: 20 minutes
- Cook Time: 18 minutes
- Category: Dessert
- Method: Baking
- Cuisine: French
Nutrition
- Serving Size: 1 slice
- Calories: 150
- Sugar: 5g
- Sodium: 95mg
- Fat: 10g
- Saturated Fat: 6g
- Unsaturated Fat: 4g
- Trans Fat: 0g
- Carbohydrates: 13g
- Fiber: 0g
- Protein: 2g
- Cholesterol: 30mg